Hi everyone
Today we are going to look for a Box called Codo which is rated as Easy in terms of difficulty. This machine has various phases: Recon, Enumeration, Exploitation and Privilege Escalation.
Box Type: Linux
Recon & Enumeration
Enumeration plays a very significant role in pen testing. The more properly you enumerate the more it will be easy to get a foothold on the target.
First, we will check whether target is reachable or not with ping command:
ping Target_IP
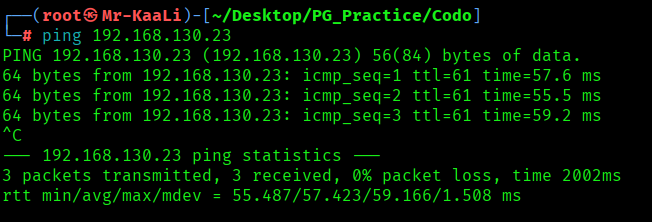
With ping command output we found that the target is reachable.
Now let’s move ahead and run the port scan for which we will be using Nmap a popular tool for port scanning and it will provide details of the various ports which are in Open state. The command for that will be:
nmap -sC -sV -O -oA nmap/initial 192.168.130.23
nmap -sC -sV -O -p- -oA nmap/full 1192.168.130.23 -T4
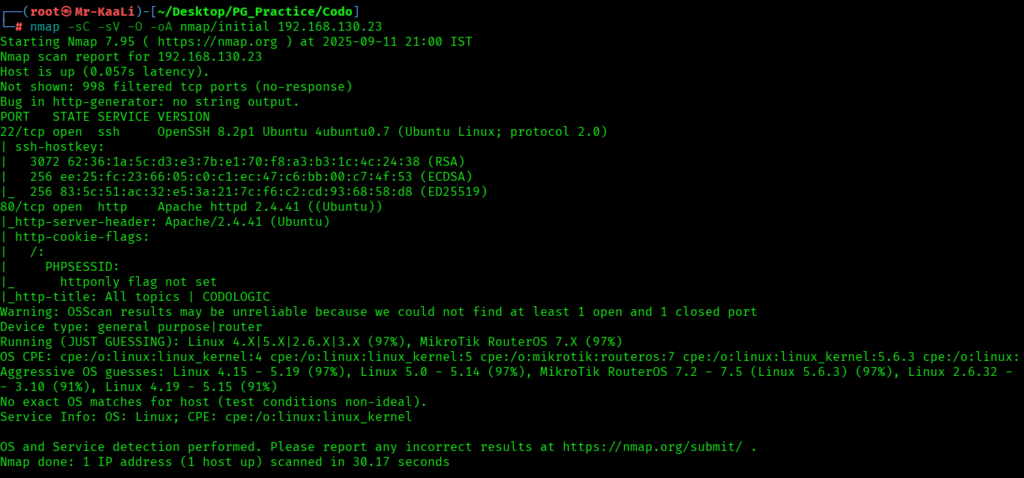

I discovered these ports are open:
- 22/tcp – SSH Service running OpenSSH 8.2p1 Ubuntu 4ubuntu0.7 (Ubuntu Linux; protocol 2.0)
- 80/tcp – HTTP Service Apache httpd 2.4.41 ((Ubuntu))
- OS: Linux (Ubuntu)
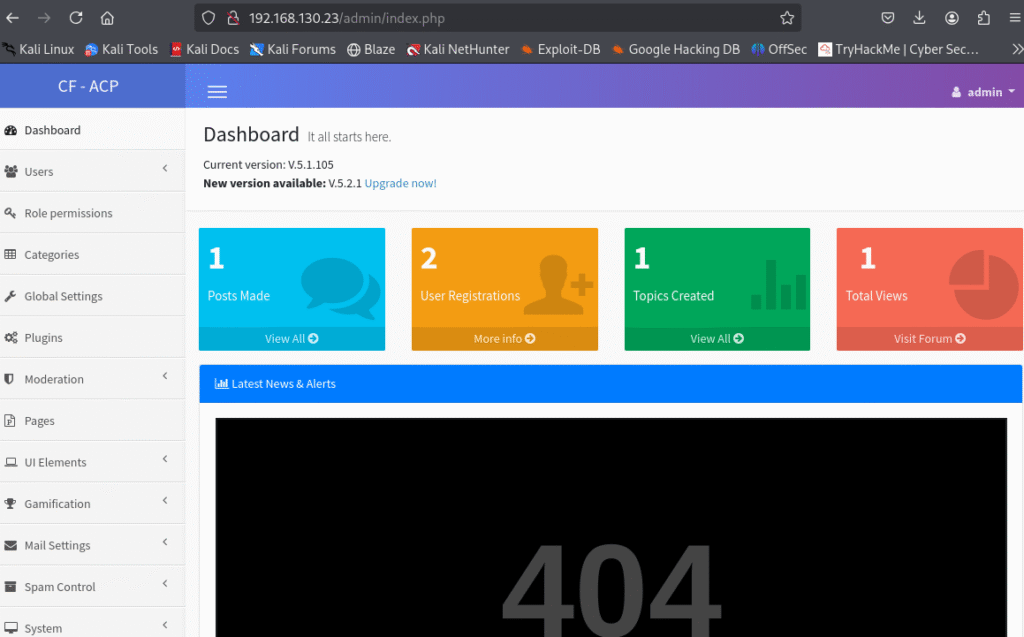
Let’s move ahead and check the IP in the web browser and I found codologin cms page:


Adding /admin provides the admin page and it was easy to bypass with the admin and admin creds:

Exploitation
I quickly added the php extension in the allowed upload types:

I used the php reverse shell file which is present in Kali linux or you can take from pentestmonkey also here:
https://pentestmonkey.net/tools/web-shells/php-reverse-shell
I added the reverse shell file in the upload logo field and started the netcat listener and

After starting the listener I quickly entered the path where images were getting uploaded , I found the path from the exploit details:

I executed the file and got the initial foothold and I found a user called offsec but nothing else:

Privilege Escalation
Now it was a time for escalating the privileges:
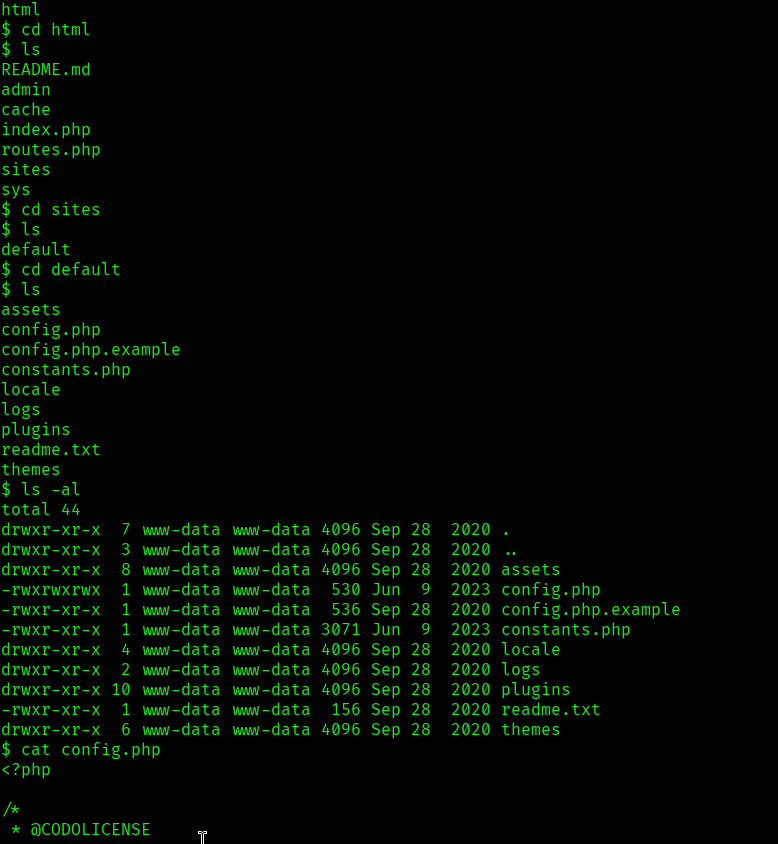
I went ahead and check for the CMS database config file location:

Then I checked and found the config file in that location and found a password which I thought was for offsec user but I was lucky that it worked for root user:
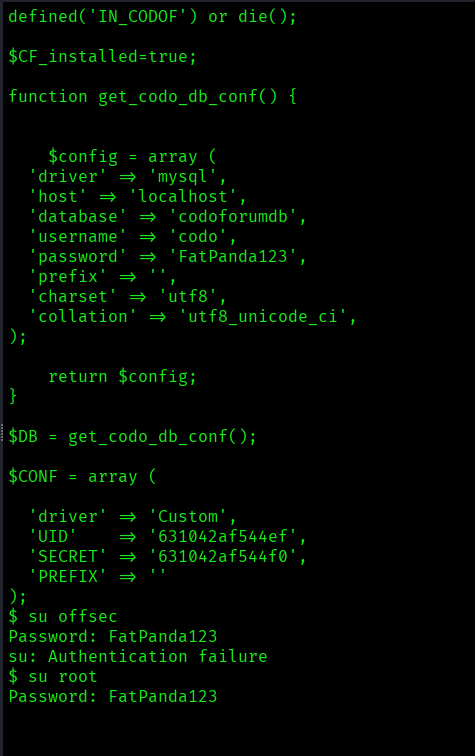
I used the password found and boom I was the root:

The above image shows the proof.txt file.
Key Takeaways
- Always change default credentials (admin:admin was used to bypass login).
- Proper enumeration of services and directories is essential for finding entry points.
- Look for insecure file upload functionalities that can be exploited for reverse shell access.
- Check configuration files for hardcoded credentials during privilege escalation.
- Always verify discovered credentials against all available user accounts.
If you enjoyed this post, share it with your friends and colleagues!